
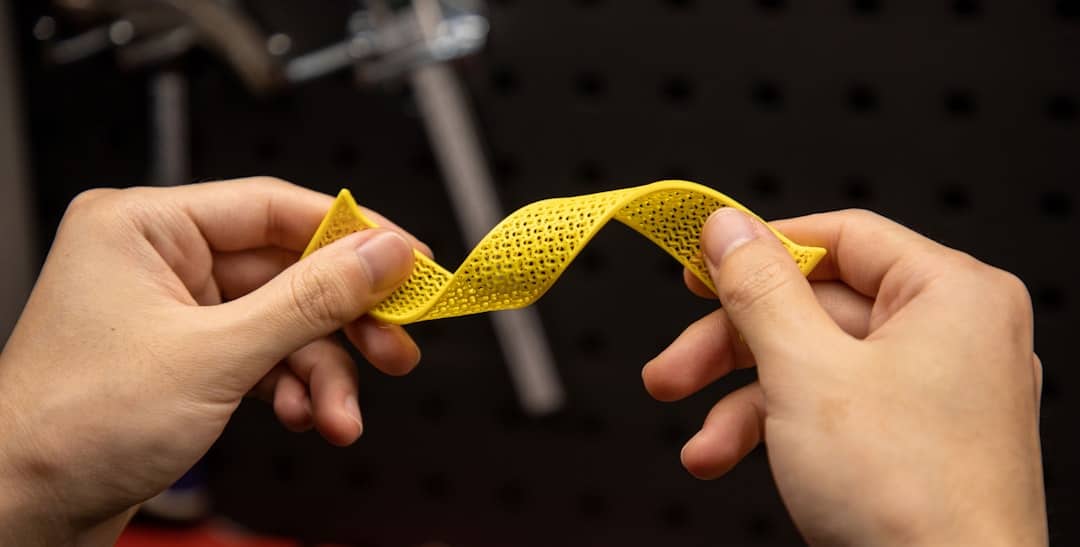
If you’ve ever specced a gasket that came out rock-hard, or a phone bumper so floppy it wouldn’t stay on, you’ve run into the single most misunderstood number in flexible parts: Shore hardness. When you order from a TPU 3D printing service, the difference between a part that seals, grips, and cushions the way you imagined and one that fails on the bench usually comes down to picking the right durometer — and then specing your part so the material can actually do its job. This guide decodes Shore hardness for buyers who need real flexible parts made, not hobbyists tuning a printer.
TPU (thermoplastic polyurethane) is the workhorse flexible filament in FDM. It’s tough, abrasion-resistant, and springs back after deformation. But “flexible” is a spectrum, not a switch. A TPU dash grommet and a TPU vibration mount can be the same polymer family and behave completely differently. Let’s fix that.
What Shore hardness actually measures (and why your TPU 3D printing service asks)
Shore hardness is a measure of a material’s resistance to indentation. For flexible parts you’ll almost always see the Shore A scale (soft rubbers and elastomers) and occasionally the Shore D scale (hard plastics and rigid TPUs). The number that follows — like 95A or 85A — tells you where the material sits on that scale. Higher number, harder and stiffer. Lower number, softer and squishier.
Here’s the intuition most people find useful:
- Shore 60A — think a soft pencil eraser or a squishy silicone spatula. Deforms easily under a thumb.
- Shore 85A — like a firm rubber shoe heel or a skateboard wheel. Flexes, but pushes back.
- Shore 95A — like a hard hockey puck or a shopping-cart wheel. Bends only with real force; the most common FDM TPU.
- Shore 60–75D — into semi-rigid territory: a hard hat, a ski boot. Barely “flexible” at all.
Most FDM-printable TPU on the market lands around 95A, because that hardness prints cleanly and reliably through an extruder. Softer grades (85A, 75A) exist and are wonderful for gaskets and grips, but they’re gummier to process and not every material menu carries them. That matters for your buying decision, which is why the smart move is to check what durometers are actually available in the instant quote tool before you commit a design to a specific softness.
The buyer’s Shore hardness cheat sheet by part type
Rather than memorizing durometer numbers, spec by what your part has to do. Here’s the practical mapping we see across real orders — gaskets, grips, bumpers, seals, and vibration mounts.
| Part type | Target Shore | Why this hardness | Watch-outs |
|---|---|---|---|
| Static gasket / seal | 75A–85A | Needs to compress and conform to fill gaps | FDM layer lines can leak liquid; design compression in |
| Tool / handle grip | 85A–95A | Soft enough to feel cushioned, firm enough to keep shape | Too soft feels mushy and wears fast |
| Bumper / impact pad | 85A–95A | Absorbs shock while returning to shape | Under-thick walls bottom out on impact |
| Vibration / anti-slip foot | 70A–90A | Damps vibration, grips surfaces | Softer grips better but deforms under sustained load |
| Wheels / rollers / drive belts | 90A–95A | Wear resistance under load and rotation | Too soft = rolling resistance and heat buildup |
| Living hinge / flexible clip | 95A | Needs to spring back thousands of cycles | Print orientation drives fatigue life |
| Protective enclosure / phone case | 90A–95A | Holds shape, cushions drops, snaps on | Corner geometry matters more than durometer |
Durometer isn’t the whole story: geometry does half the work
Here’s the thing nobody tells you when you’re staring at hardness charts: you can make a 95A part behave like a much softer one by changing the geometry — and you control that geometry in your STL and in the settings you choose at quote time.
Two levers do most of the flexing:
- Wall thickness. A 95A TPU wall at 1.2 mm flexes noticeably; the same 95A material at 4 mm feels almost rigid. When you upload your STL and set wall count in the instant quote tool, you’re literally dialing in how stiff a given hardness will feel.
- Infill. A bumper printed at 15% infill compresses and rebounds like foam; the same part at 60% infill feels dense and firm. Infill is one of the settings you select yourself in the tool, so a single STL can span a wide effective-softness range depending on what you pick.
This is genuinely liberating for buyers. If your material menu tops out at 95A but you need a squishier feel, you don’t necessarily need to hunt for 75A stock — you can thin walls, drop infill, or add rib/lattice geometry to your STL and get compliant behavior from a harder material. Conversely, if a soft grade feels too mushy, thicker walls firm it right up.
Where FDM TPU shines — and where you should manage expectations
An honest TPU 3D printing service tells you the trade-offs up front, so you spec once and order once. TPU printed with FDM is excellent for:
- Grips, bumpers, and cushioning where abrasion resistance and rebound matter.
- Vibration isolation feet and anti-slip pads under equipment.
- Flexible clips, straps, and living hinges that need to survive repeated cycles.
- Protective cases and edge guards that must absorb impact without cracking.
- Low-volume elastomer parts where injection molding a soft tool would be absurdly expensive. If you’re weighing volumes, our take on 3D printing vs injection molding for low-volume production is worth a read.
Manage expectations on fluid-tight sealing. FDM builds parts layer by layer, and those layer boundaries can wick liquid or gas under pressure. For a gasket that squeezes between two flanges and seals by compression, TPU is great. For a part that must be watertight under pressure straight off the printer, design generous compression into the joint and validate it — and talk to us before you order so we can advise on wall count and orientation for your specific seal.
How your Shore and geometry choices show up on the quote
Because the instant quote tool prices exactly what you select, a few TPU-specific choices move the number in predictable ways:
- Infill: A cushioning part at 15% infill uses less material and prints faster than the same part at 50% — so lower effective softness settings often cost less, not more.
- Wall count: More perimeters mean more flexible-material contact and stiffer parts, but also more material and time. Two to three walls is a sweet spot for many flexible parts.
- Layer height: Finer layers give smoother grips and better sealing surfaces but add print time; coarser layers are cheaper and fine for internal bumpers.
- Part volume and quantity: Small flexible feet are pennies of material; a thick-walled bumper is more. And because there’s no minimum order quantity, you can order one to test, then a batch to deploy.
The beauty of self-serve quoting is that you can test all of this instantly. Want to see how much stiffer-and-pricier three walls at 40% infill is versus two walls at 15%? Upload your STL, run it once, change the settings, and run it again. It’s the fastest A/B test in manufacturing, and it puts the softness-vs-cost trade-off entirely in your hands.
Specing your flexible part: a quick pre-upload checklist
- Name the failure mode. Does it need to seal, grip, cushion, or flex-and-return? That points you to a Shore range from the table above.
- Set your effective softness with geometry, not just durometer. Thin walls and low infill for squish; thick walls and higher infill for firm.
- Design compression into seals. Give a gasket 15–25% squeeze room rather than expecting a flat surface to seal.
- Mind fatigue-critical bends. Living hinges and clips are strongest when the flex direction runs along the layers — mention this to us if it’s mission-critical.
- Export a clean STL. Watertight mesh, correct scale in millimeters. If you need a hand getting a print-ready file from your designer, see how to get your 3D design professionally printed in Canada.
TPU is also a hero material for one common buyer scenario: replacing a worn-out flexible part you simply can’t buy anymore — a cracked bumper, a perished grommet, a discontinued anti-vibration mount. If that’s you, our guide to replacing hard-to-find plastic parts with 3D printing pairs perfectly with this one, as does the case for getting a one-off part made fast.
TPU vs the rigid options: when flexible is the wrong call
Sometimes buyers reach for TPU when a semi-rigid or rigid material would serve better — for example a bracket that “flexes a bit” is usually a job for a tougher rigid material, not an elastomer. If your part is primarily load-bearing and only needs a touch of give, compare notes against our roundup of the strongest 3D printing materials for functional parts. And if you’re building mounts and fixtures where vibration is the enemy, TPU pads combined with rigid brackets — a trick we cover in automotive custom mounts and fixtures — often beat trying to make one part do everything.
Ready to spec your flexible part?
The best part about ordering from a modern TPU 3D printing service is that you’re in control: you pick the material, colour, layer height, infill, and wall count yourself, and the quote reflects exactly those choices instantly. Upload your STL, dial in the softness you want through geometry and settings, and see your price in minutes — with no minimum order quantity and tariff-free (CUSMA-compliant) shipping for our U.S. customers.
Not sure whether 85A geometry tricks or a firmer 95A grade is right for your gasket, grip, or bumper? Head to 3D Printing Room to run an instant quote — or contact us for material guidance before you order, and we’ll help you nail the flex before a single layer goes down.


Leave a Reply